Microsoft Hyper-V 2012 Live Migration and Constrained Delegation

One feature with any good virtualization solution should have the ability to make your VMs mobile. With VMware the feature is called vMotion and with Hyper-V it’s Live Migration. When your just using the Hyper-V manager and you need to do a live migration from one system to the next you would have to log into the actual host (hyper-v server) that’s running the VM that you wanted to move. This is unless you configured constrained delegation in Active Directory on the hyper-v host objects and configured hyper-v to use the kerberos authentication protocol with live migration. This is somewhat of a pain but it’s not necessary when using System Center Virtual Machine Manager which is Microsofts somewhat equivalent to VMware’s vCenter. But that’s another topic. Here is how you would configure the hyper-v systems so you can do a live migration when using the Hyper-V manager without having to do it from the source host of the VM that needs to be moved.

Configure Hyper-V Live Migration:

1. From Server Manager, click Tools and then click Hyper-V Manager.
2. In the navigation pane, select one of the servers that you want to configure for live migrations.
3. In the Action pane, click Hyper-V Settings.
4. In Hyper-V Settings dialog box, click Live Migrations.
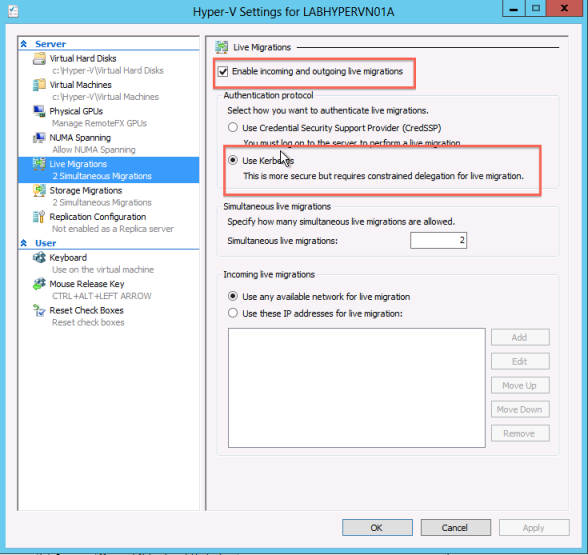
5. In the Live Migrations pane, check Enable incoming and outgoing live migrations.
6. Under Authentication protocol, select Kerberos if you have configured constrained delegation.

hyper-v-constrained-delegationsSetting up Constrained Delegation:

1. From Server Manager, select the server if it not already selected. After the server is selected, click Tools, and then click Active Directory Users and Computers. Note: If the AD management tools are not installed you will either have to install them or log into a domain controller.
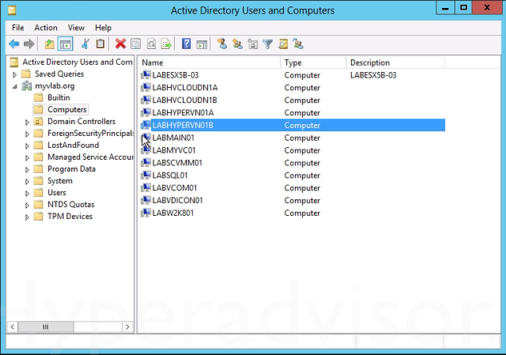
2. From the navigation pane, select the domain and double-click the Computers folder.

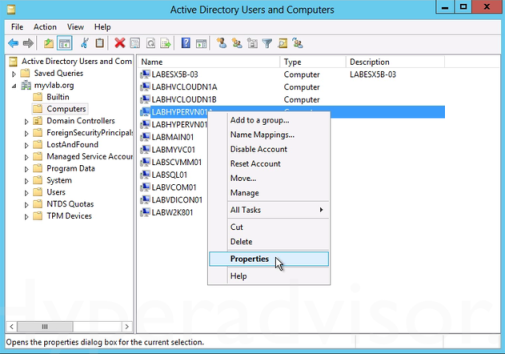
hyper-v-constrained-delegations-13. From the Computers folder, right-click the computer account of the source server and then click Properties.

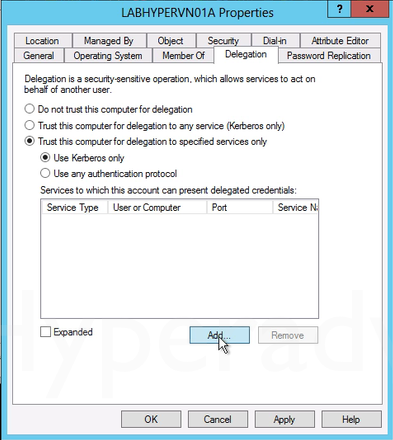
hyper-v-constrained-delegations-24. In the Properties dialog box, click the Delegation tab.
5. On the delegation tab, select Trust this computer for delegation to the specified services only. Then select Use Kerberos only.
6. Click Add.

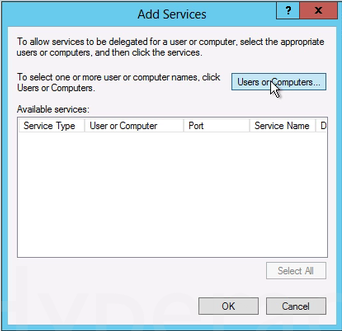
hyper-v-constrained-delegations-37. In the Add Services dialog box, click Users or Computers.

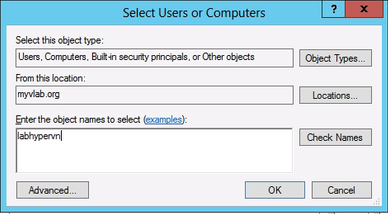
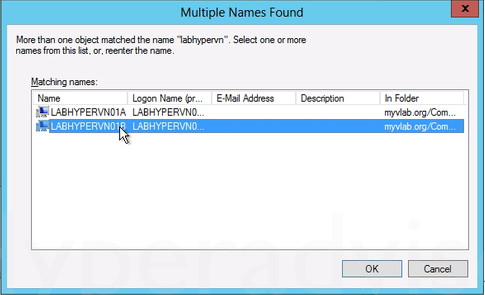
hyper-v-constrained-delegations-3a8. In the Select Users or Computers dialog box, type the name of the destination server. Click Check Names to verify that you typed the name correctly, and then click OK.

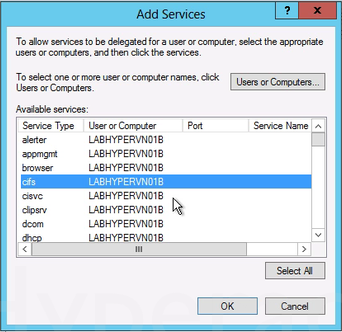
hyper-v-constrained-delegations-3bhyper-v-constrained-delegations-49. To move virtual machine storage, select cifs. This is required if you want to move the storage along with the virtual machine, as well as if you want to move only a virtual machine’s storage. If the server is configured to use SMB storage for Hyper-V, this should already be selected.

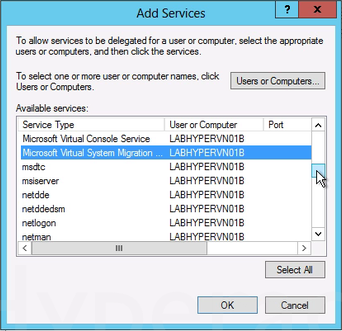
hyper-v-constrained-delegations-510. To move virtual machines, select Microsoft Virtual System Migration Service.

hyper-v-constrained-delegations-611. On the Delegation tab of the Properties dialog box, verify that the services you selected in the previous step are listed as the services to which the destination computer can present delegated credentials. Click OK.
12. From the Computers folder, select the computer account of the destination server and repeat the process. In the Select Users or Computers dialog box, be sure to specify the name of the source server.

Migration From Exchange 2010 to Exchange 2013 Part 2

Migrating Public Folders from Exchange 2010 to Exchange 2013

Exchange 2013 Migration Step 7 “Migrate Public Folders”

1. Make sure the user you will be performing the migration as, is in the right security groups, (Organizational Management and Recipient Management).

00001s2. On the Legacy Exchange server download the migration scripts. Then extract them to the servers C: drive.

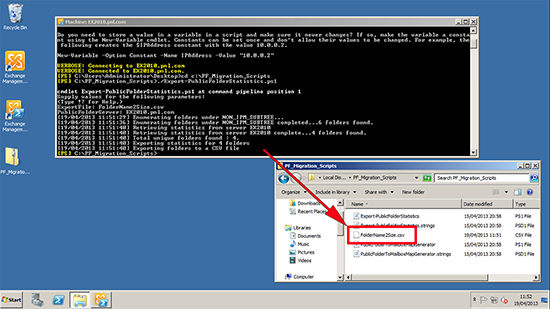
00002s3. Launch the Exchange Management Shell > Change to the script directory > Then create a folder name to folder size mapping file by running the Export-PublicFolderStatistics.ps1 script, supply name of the file you want to create. (here I use FolderName2Size.csv). Then supply the name of the server (the legacy one with the public folders on it).

00003s4. Create a Public Folder to Mailbox mapping file, by running the PublicFolderToMailboxMapGenerator.ps1 script, supply it with the maximum mailbox size (in bytes) Note: The Maximum size is 25 GB. You will also need to supply the import file you created in step 3 (FolderName2Size.csv). Finally supply the name of the output file you wish to generate PFFolder2Mailbox.csv.

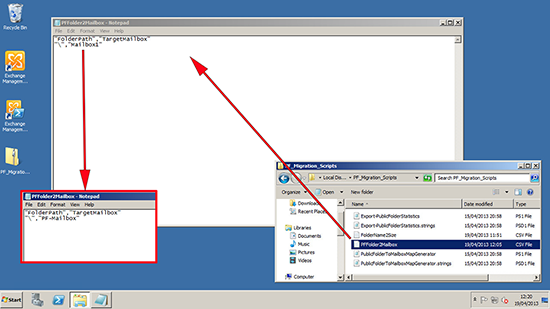
00004s5. Open the last CSV file you created (PFFolder2Mailbox.csv) and take note of the TargetMailbox name. By default mines called Mailbox1, I’m changing it to PF-Mailbox and saving the change. Note: You may get more than one! If so take note of them all, or rename them accordingly.

00005s6. Now go to the new Exchange 2013 Server, and create the new public folder MAILBOX. (Note: Public folders are now in a Mailbox, NOT their own Mailbox database as in previous versions of Exchange).

New-Mailbox -PublicFolder PF-Mailbox -HoldForMigration:$true -Database Mailbox-Database-2013

00006sNote: Create as many as were listed in your output file above, and name them accordingly.

7. Copy the PFFolder2Mailbox.csv file (Generated above) from the 2010 Server to the Exchange 2013 Server, In this example I will put them in C:\PF-Import-File\

00007s8. Create a new migration request;

New-PublicFolderMigrationRequest -SourceDatabase (Get-PublicFolderDatabase -Server EX2010) -CSVData (Get-Content C:\PF-Import-File\PFFolder2Mailbox.csv -Encoding Byte)

Note: If you have ever done a move request, (either for a mailbox or a public folder) you may be familiar with the concept of BadItemLimit and AcceptLargeDataLoss. (If you are not it’s a system of parameters you set when moving data, to allow ‘Bad Items’ which would cause a migration to otherwise fail), these can be a corrupt email or an email in a language format that Exchange does not understand. Thanks to Eske (Boxx Jakobsen) for the feedback asking me to include those switches.

New-PublicFolderMigrationRequest -SourceDatabase (Get-PublicFolderDatabase -Server EX2010) -CSVData (Get-Content C:\PF-Import-File\PFFolder2Mailbox.csv -Encoding Byte) -AcceptLargeDataLoss -BadItemLimit <SwitchParameter>


<SwitchParameter> = 0 to 2147483647

If you set the BadItemLimit parameter to more than 50, you need to set the AcceptLargeDataLoss parameter to true.

00008s9. To check progress;

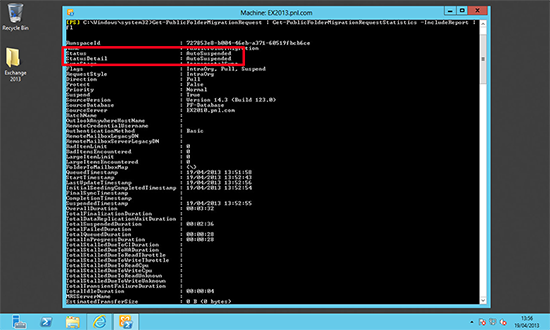
Get-PublicFolderMigrationRequest | Get-PublicFolderMigrationRequestStatistics -IncludeReport | fl

It might say Queued for quite a while, don’t worry! DO NOT PROCEED until the status says AutoSuspended;

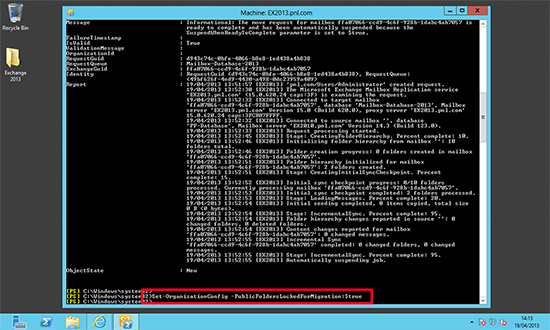
00009s10. If you were looking a the progress you will see its stops just before 100%, this is because you need to “Lock” the source public folder and let the migration complete. WARNINIG this will involve downtime warn your users or do this out of hours.

Set-OrganizationConfig –PublicFoldersLockedForMigration:$true

00010sNote: I have had feedback to say this command should be ran on the Exchange 2010 Server, this TechNet article confirms.

11. Now access to the legacy Public Folder Database is shut down and replication to the new Public Folder Mailbox is completed in the background. This can take a little time, I would wait least a couple of hours before proceeding (depending on your network topology, if you have a slow network or the Exchange2010 server is on another network segment it may take longer).

It’s All Gone Wrong!

Don’t panic! You can remove the migration request with the following command;

Get-PublicFolderMigrationRequest | Remove-PublicFolderMigrationRequest

12. Complete the migration, with the following two commands;

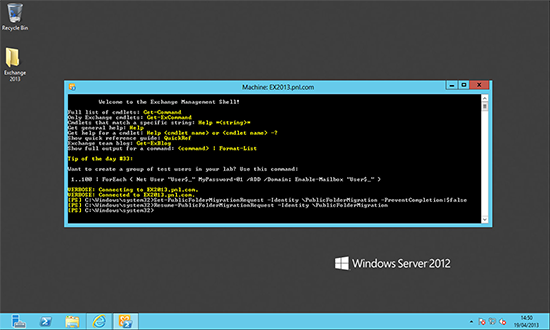
Set-PublicFolderMigrationRequest –Identity \PublicFolderMigration -PreventCompletion:$false
Resume-PublicFolderMigrationRequest –Identity \PublicFolderMigration

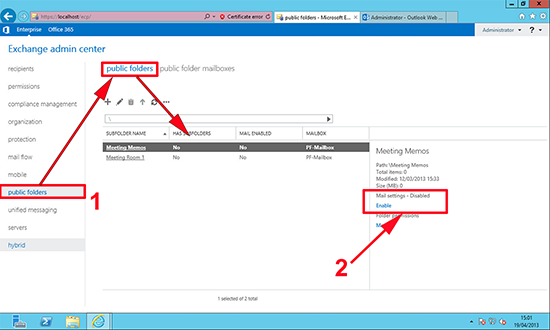
00011s13. Confirm that, the public folders are now correct and available.

Note: As per feedback (from Tobias Gebler) Test mail flow to your public folders, you may need to manually “Mail Enable” them before they function properly, In some cases you need to disable then re-enable them before they work properly.

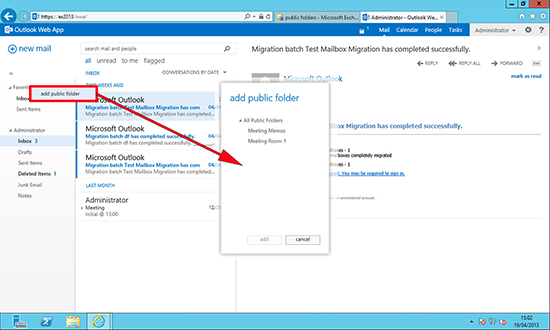
00012s14. Remember in Outlook Web App 2013, public folders are not visible until you add them!

00013s

Migration From Exchange 2010 to Exchange 2013 Part 1

Problem

To complete a migration from Exchange 2010 (or 2007) to Exchange 2013, you need to introduce Exchange 2013 into your existing Exchange environment, then migrate your content onto the new server(s), and finally remove Exchange 2010.

Solution

Assumptions:

In this example I’ve got aexisting Exchange 2010 environment running on Windows Server 2008 R2. I’m putting in Exchange 2013 onto a new server running Server 2012. Post install the NEW server will hold client access, and mailbox roles.

Exchange 2013 Role Placement

Unlike with previous versions of Exchange, the 2013 approach is NOT to split up roles to different servers, it’s considered good practice to deploy all roles on all Exchange servers.

Exchange 2013 Licensing

Unless you have Microsoft “Software Assurance” you cannot simply upgrade to Exchange 2013 for free. You will need to buy the Exchange 2013 Base productYou may wish to look at an “Open Value Agreement”, which lets you pay the cost over a three year term.

The Exchange 2013 (on-premeses) software itself comes in two flavours, Standard and Enterprise.

Standard: For small Exchange deployments (1-5 Mailbox Databases) and for non mailbox role servers in larger Exchange deployments.

Enterprise: For large Exchange deployments (1-50 Mailbox Databases).

Exchange 2013 Client Access Licenses

As before there are two types of CAL for Exchange 2013 access. These are also ‘confusingly’ called Standard and Enterprise.

Note: An Enterprise CAL is NOT just for Exchange Enterprise 2013 and a Standard CAL is NOT just for Exchange Standard, this is a common mistake. Though you can mix and match, i.e. a standard CAL is required for all mailbox users or devices, adding an Enterprise CAL is only required for those existing users or devices requiring additional functionality.

Standard CAL: Required for all users (or devices) that require access to an Exchange mailbox. For most people these will be the CALS you need to purchase.

Enterprise CAL: Is an additional licence that’s added to the Standard licence, this enables the user to use archiving/journalling and unified messaging (Requires Outlook 2013). It also gives access to more advanced ActiveSync management policies and custom retention policies.

Exchange 2013 Migration Step 1 “Planning / Pre Site Visit”

1. Media and Licences: Before you start you will need to have the Exchange 2013 CU2 (CU1 = Minimum) version of the install media (.iso or DVD). DO NOT attempt to perform the migration with a version of Exchange media that IS NOT at least CU1. Warning, this will be a DVD image (over 3.5 GB), you may wish to get this downloaded from a site with a decent internet connection!

2. Make sure any third party Exchange software you are currently running is also supported on Exchange 2013, e.g. Anti Virus, Backup Solutions, Archiving, Mail Management, Mobile Device Software, etc, check with the software vendor.

3. DO NOT CONSIDER migrating anything until you know you have a good backup of your current Exchange environment. If you are lucky enough to have VMware ESX, Hyper-V or another virtualisation platform, consider doing a P2V conversion on your Exchange 2010 server then simply turning the 2010 Server off, then if it all goes to hell in a hand cart simply turn the original server back on again.

4. Outlook Client Access: Be aware your clients need to be using the following versions of Outlook BEFORE you migrate them.

  • Outlook 2013.
  • Outlook 2010 (With SP1 and this update).
  • Outlook 2007 (With SP3 and this update).
  • Outlook for Mac 2011.
  • Entourage 2008 for Mac, Web Services Edition.

Exchange 2013 Migration Step 2 “Pre-Install”

I would suggest you run through the Microsoft Exchange Server Deployment Assistant, as a “Belt and braces” approach to the migration”

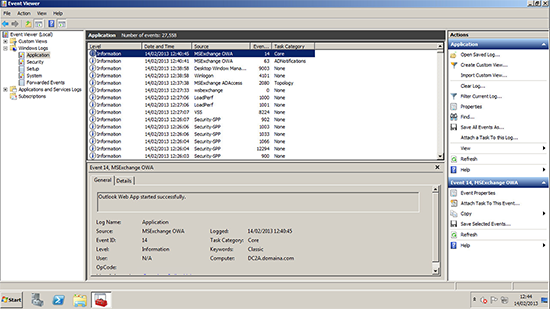
1. Before you do anything, it’s time for a common sense check, make sure your existing Exchange 2010 Organisation is happy and running cleanly, and has good communication with both the domain and your DNS. Get in the event logs and make sure it’s a happy server.
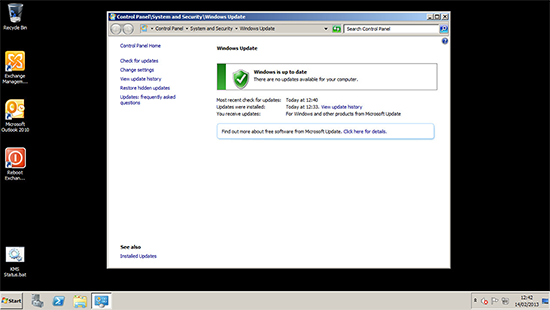
00001s2. Run a full Windows update on your existing Exchange server(s), this will install any Exchange roll-ups that are outstanding.
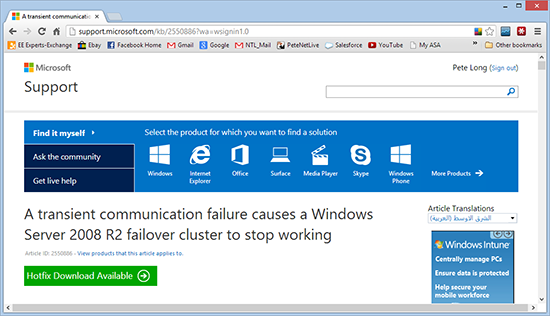
00002s3. If you are planning to utilise DAG, then you should install the following hot-fix on your Exchange 2010 servers before deploying SP3.
00004s4. For coexistence of Exchange 2010 and Exchange 2013, Your Exchange 2010 Servers must have Service pack 3 installed. If you are upgrading from service pack 1 you may see the following error.

Exchange 2010 Service Pack 3 Error – ‘The IIS 6 WMI Compatibility component is required’

00003s

5. After SP3 apply the latest Update Rollup, (at 03/06/13 currently Update Rollup 1) download.

Exchange 2013 Migration Step 3 “Server Prerequisites”

1. The server that will run Exchange 2013, will need to be a domain member*, and I would run all the current updates before you start.

00005s

Once that is complete there are a number of server roles that will need adding. (Note: these roles are the SAME for both CAS and Mailbox Servers).

*Note: As with previous versions of Exchange it is recommended that you DO NOT run Exchange 2013 on a domain controller.

To add the Exchange 2013 Server roles via PowerShell

Note: Here on my ‘Test Network’ the server in question is also a domain controller. In your production environment this will probably NOT be the case. If so, you will need to install the Remote Server Administration Tools for Active Directory.

Install-WindowsFeature RSAT-ADDS

Issue the following commands;

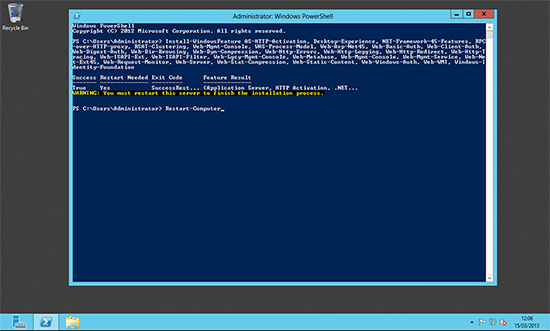
Install-WindowsFeature AS-HTTP-Activation, Desktop-Experience, NET-Framework-45-Features, RPC-over-HTTP-proxy, RSAT-Clustering, Web-Mgmt-Console, WAS-Process-Model, Web-Asp-Net45, Web-Basic-Auth, Web-Client-Auth, Web-Digest-Auth, Web-Dir-Browsing, Web-Dyn-Compression, Web-Http-Errors, Web-Http-Logging, Web-Http-Redirect, Web-Http-Tracing, Web-ISAPI-Ext, Web-ISAPI-Filter, Web-Lgcy-Mgmt-Console, Web-Metabase, Web-Mgmt-Console, Web-Mgmt-Service, Web-Net-Ext45, Web-Request-Monitor, Web-Server, Web-Stat-Compression, Web-Static-Content, Web-Windows-Auth, Web-WMI, Windows-Identity-Foundation, RSAT-Clustering-CmdInterface

 Then Reboot;

Restart-Computer
00006s

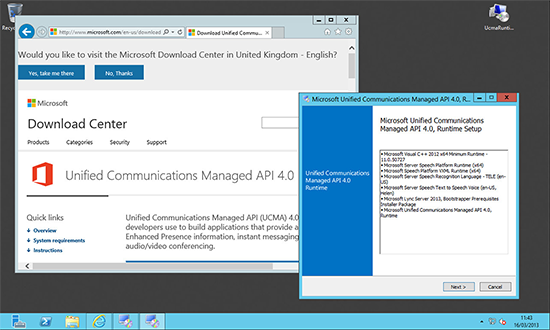
2. You will need to install the Microsoft Unified Communications Managed API 4.0, Core Runtime 64-bit.
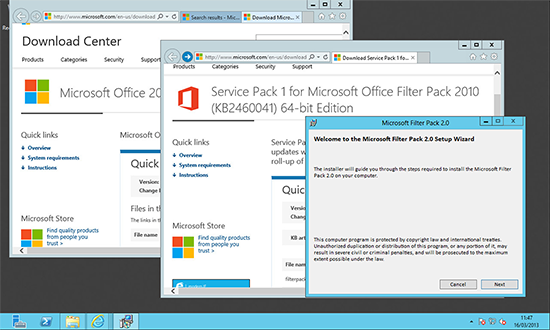
00007s3. You will also need to install the Microsoft Office 2010 Filter Pack 64 bit and Microsoft Office 2010 Filter Pack SP1 64 bit.
00008s

Exchange 2013 Migration Step 4 “Install Exchange 2013”

Note: Ensure the Exchange 2013 Media version you are using is CU3. {download here}

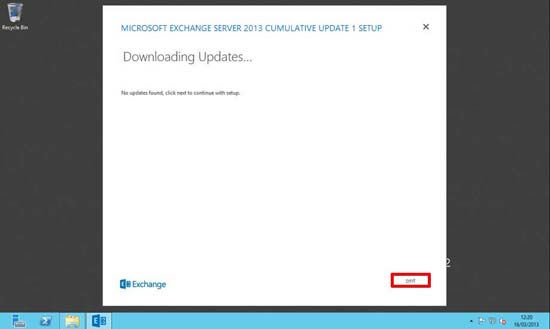
1. Insert the DVD or open the install files and run setup.exe. It will attempt to find any outstanding updates before it starts.
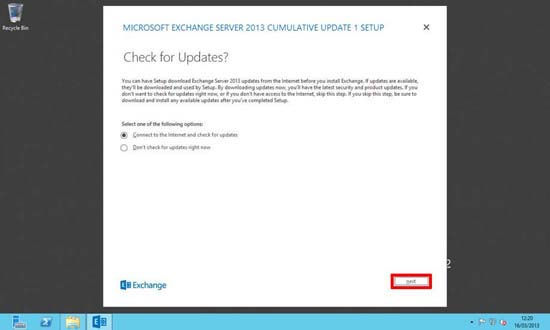
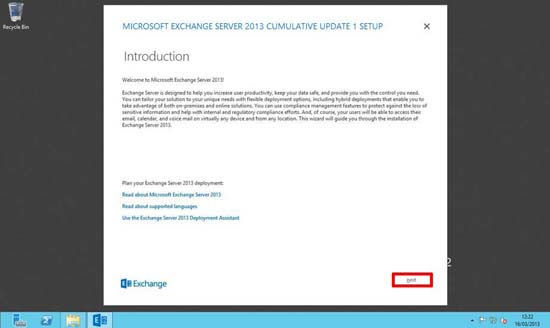
00009s2. Next.

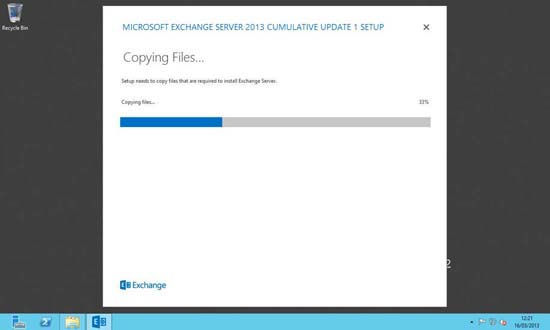
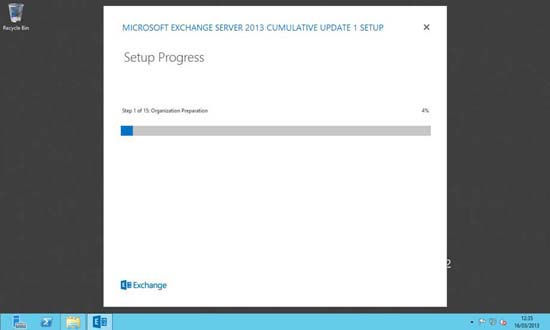
00010s3. Setup will begin copying files.

00011s4. Next.

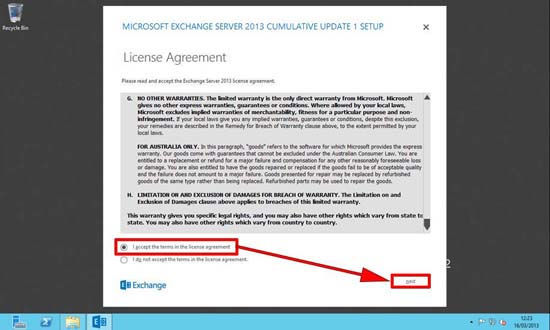
00012s5. Accept the EULA > Next.

00013s6. I tend to disable feedback, but the choice is yours > Next.
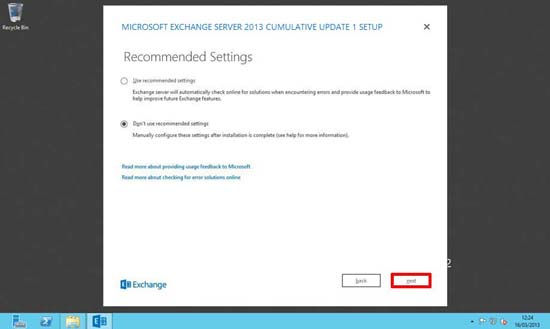
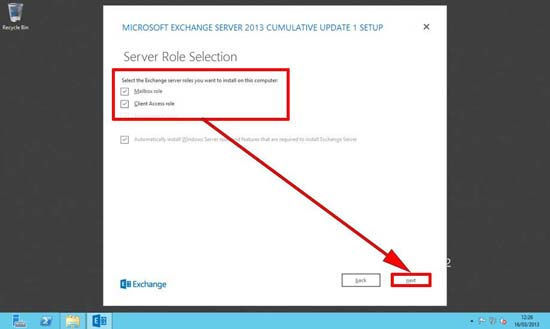
00014s7. Select the server roles that you wish to install.
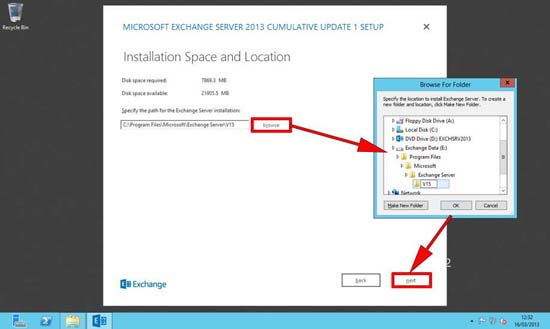
00015s8. Select the folder that you wish to install the Exchange program into.

Note: Remember if deploying multiple Exchange 2013 servers, it’s considered good practice to keep the folder paths contiguous across all the servers.
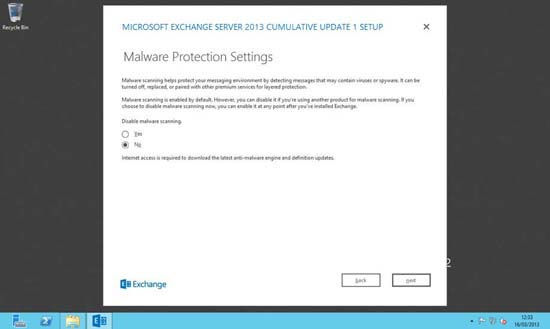
00016s9. If you plan to deploy third party malware protection (post Install), then you might wish to disable this, but in most cases you will want it enabled > Next.

Note: This is built on technology that was called ‘Forefront’ in previous versions of Exchange.
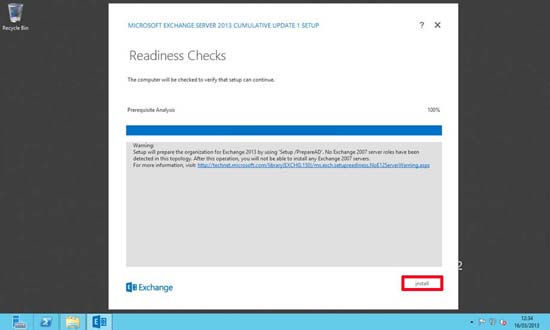
00017s10. Pre deployment readiness checks will be carried out > when complete > Next.
00018s11. Setup will take quite some time.

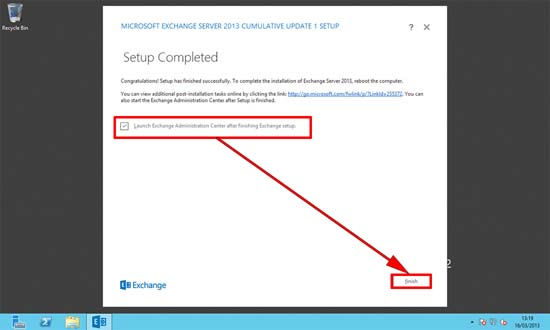
00019s12. When complete, tick the box to launch the admin console > Finish.
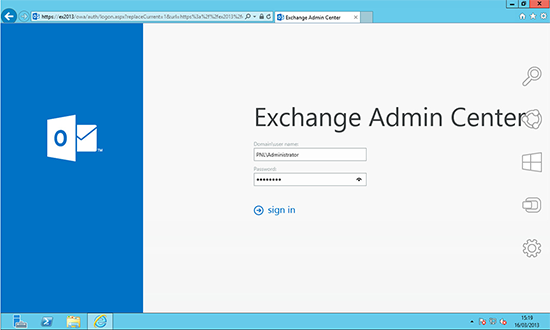
00020s13. After a few seconds the Exchange Admin Center will open.
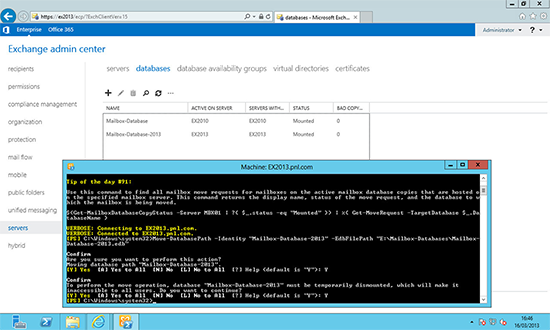
00021s14. At this point I would move the new Exchange Database from its default location to its own volume/folder, (again keep this path contiguous across all the new servers). The following PowerShell command will do this for you;

Move-DatabasePath -Identity "Database Name" -EdbFilePath "E:\Folder Name\Database name.edb" –LogFolderpath “E:\Folder Name”
00023s

Exchange 2013 Migration Step 5 “Migrate Mailbox’s”

STOP! Before you proceed you need to think about OWA access. For internal access this will not be a problem BUT if you have users that access OWA externally (e.g. via https://mail.yourpublicdomain.com/owa) Then you will have to DO SOME PLANNING. Unless you have two free public IP addresses, your router/firewall can only point to one CAS server at a time.

STOP AGAIN! OK I’ve had more than one email about this so, here’s a warning. Moving Mailboxes creates logs, the more you move, the more logs it creates. The only way to clear these logs properly is to do an Exchange Aware/VSS Level backup. If you just start moving mailboxes without keeping an eye on this you can fill up a volume with logs, and if you are daft enough to have this on our system volume you can take the server down, you have been warned!

1. First make sure that the new server can see the existing Exchange infrastructure. From within the Exchange Admin Center > Servers. You should see both your Exchange 2010 Servers and the new Exchange 2013 Server.
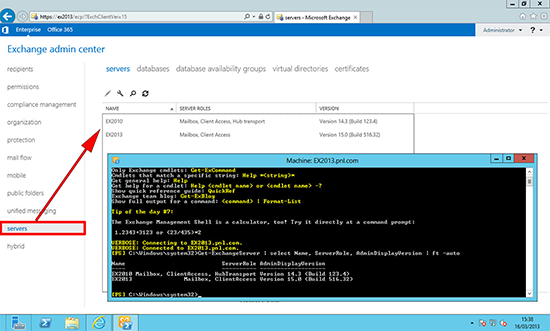
00022sNote: You can see the same with the following PowerShell command;

Get-ExchangeServer | select Name, ServerRole, AdminDisplayVersion | ft –auto

2. Test move one mailbox from Exchange 2010 to 2013, Recipients > Mailboxes > Locate our Test User > Move Mailbox.

00024s3. Give the test migration a name, and browse to the new datastore (Note: If the move fails you can increase both the BadItem limit and the LargeItem limit here as well) > Next.
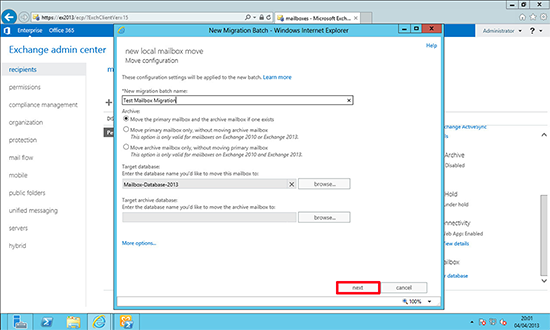
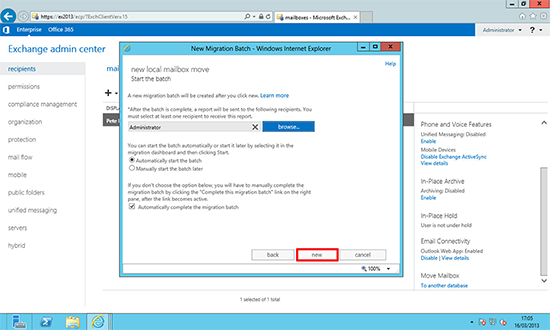
00025s4. New.00026s5. You will be asked if you want to the ‘Migration Dashboard’.
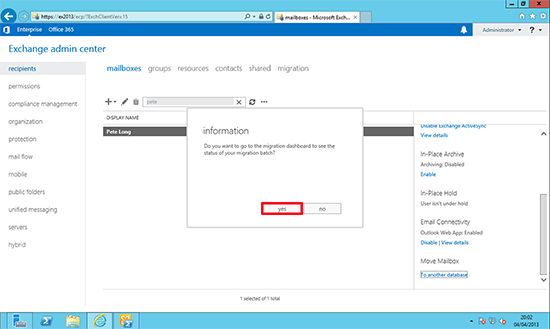
000025as6. Here you can watch progress (remember to keep hitting ‘refresh’).
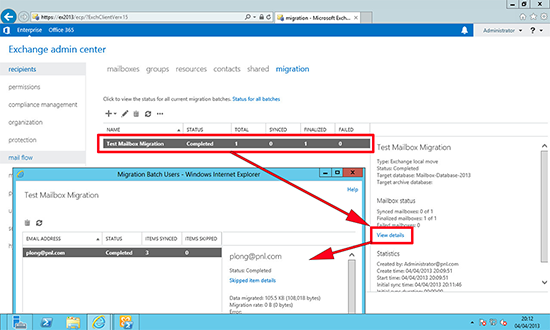
000025bs7. If you prefer to use PowerShell you can migrate all mailboxes from one database to another with the following command;

Get-Mailbox -Database Mailbox-Database | New-MoveRequest -TargetDatabase Mailbox-Databse-2013

If you have more than 1000 mailboxes use the following instead,

Get-Mailbox -Database Mailbox-Database -ResultSize Unlimited | New-MoveRequest -TargetDatabase Mailbox-Database-2013
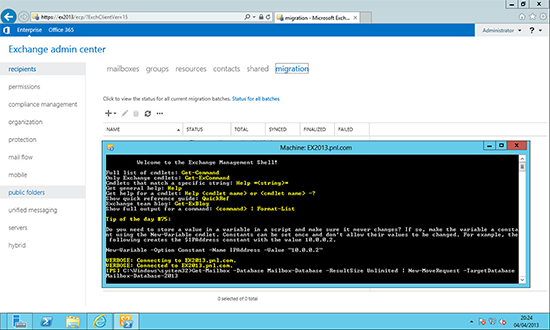
00035sDepending on the amount of mailboxes this can take a while!
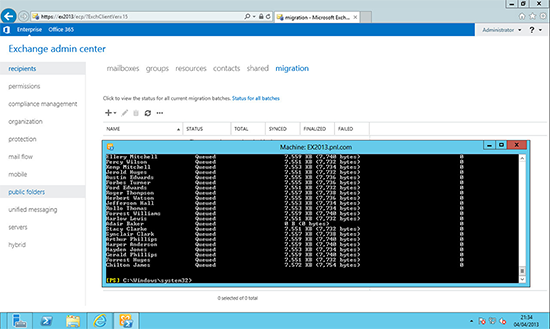
00036s8. Then test mail flow to/from this mailbox to internal recipients in the Exchange 2010 infrastructure, and then test mail flow to/from an external mailbox.
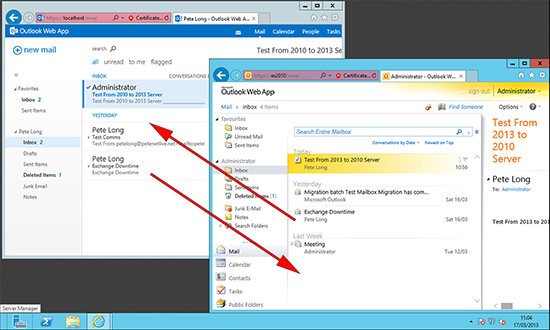
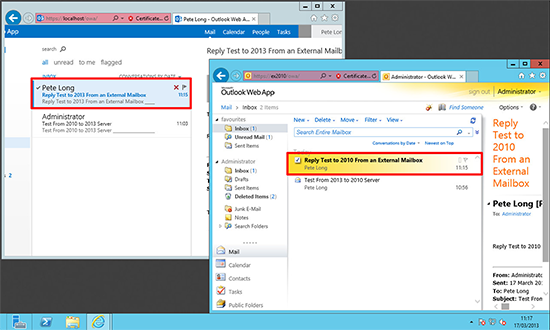
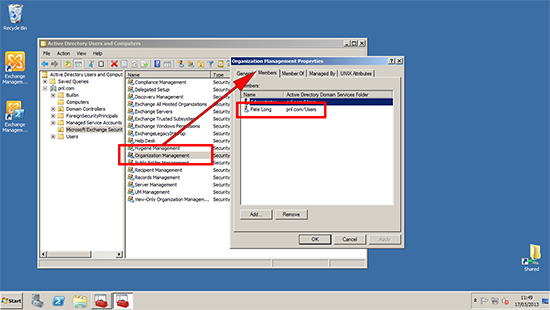
00028s 00029sNote: At this point you might struggle to connect to the Exchange 2013 Admin Center as ‘Administrator’, because that user’s mailbox is still on the Exchange 2010 Server. If that happens to you and you are ‘Locked Out‘ of the Exchange Admin Center, simply add the user you migrated already, to the Exchange Organization Management group, and log in as that user to https://{Exchange-2013-Server-Name}/ecp or if you have problem to get Exchange 2013 ECP open it like https://{Exchange-2013-Server-Name}/ecp/?ExchClientVer=15
00030s9. You can now migrate the remainder of your mailboxes.
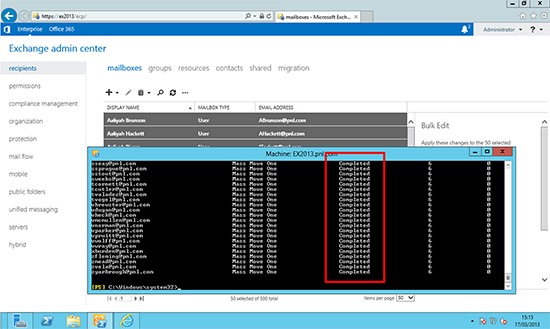
00031sNote: Depending on mailbox size this can take a VERY LONG time, I would suggest staging this migration gradually. To view progress;

Get-MoveRequestStatistics -MoveRequestQueue "Mailbox-Database-2013"

To check if anything is left in the OLD Database;

Get-MailboxDatabase -Identity "Mailbox-Database" | Get-Mailbox

Exchange 2013 Migration Step 6 “Change Mail flow”

At this point you need to change the SMTP feed from the old Exchange 2010 box to the new Exchange 2013 Server, how you do this depends on your network setup, some examples of how you might do this are,

i. Change the SMTP (TCP Port 25) Port redirect on your router/firewall.
ii. Swap IP addresses from the old to the new server.
iii. Change the translation from public to private IP address to point to the new IP.

Note: If you have any mail scanning servers, anti spam hardware devices etc, then they will also need changing to point to the new server.

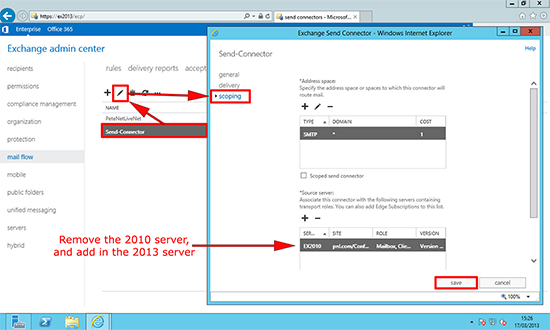
1. You will need to add the new server to your Exchange ‘Send Connector’ and remove the Exchange 2010 Server. (Note: I’m assuming you only have one send connector, if you have more than one i.e. for particular domains, or for secure TLS mail you will need to do these as well). From Exchange Admin Center > Mail flow > Send connectors > Select the send connector > Edit > Scoping > Add the 2013 server > Remove the 2010 server > Save.
00032s2. You will not need to create receive connectors on the Exchange 2013 Server, if you navigate to mail flow > receive connectors > Change the drop down to point to the Exchange 2013 Server. You will see there is a ‘Default Frontend’ Connector already configured for Exchange 2013.

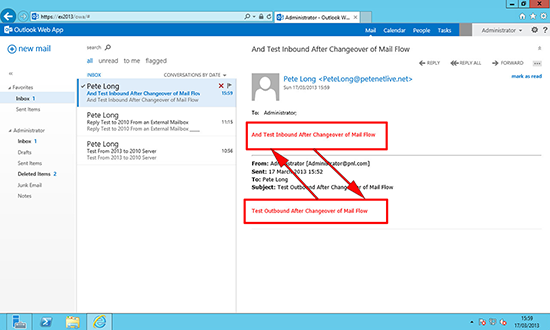
00033s3. At this point, it would be sensible to once again check mail flow, to and from an external mail account.
00034s

The trust relationship between this workstation and the primary domain failed

This guide is using the PowerShell or NETDOM tool and does not require rejoining the domain.

error1xHave you seen this? ‘The trust relationship between this workstation and the primary domain failed’
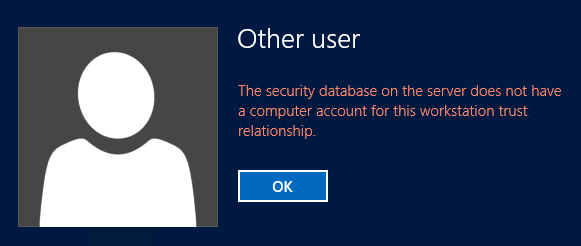
Or this? ‘The security database on the server does not have a computer account for this workstation trust relationship.’ Same issue, different symptom.

error11

I have on multiple occasions beeing a heavy Hyper-V user for my labs…
There are apparently a number of reasons why this happens, but the main reason seems to be lost connection between the ‘client/server’ and the Domain controllers. If the scheduled password change occurs while the server or client is unavailable or has been shut down, then the passwords stored in the server/client and the domain controllers for the computer account mismatch, and you will end up getting this error when trying to logon to the server. It can also appear differently, like if all service accounts stop functioning with events logged as a result, or similar that happens when the server is still running and you have been able to logon or simply never logged off.

The real question…How do we fix it? There are a number of TechNet forum threads on this(added one below as references) and many blog posts allready written, but since I’m always having difficulty finding them myself when I need them, I’ll make my own. Please feel free to borrow this knowledge and reblog/repost it yourself 🙂 (The guide however, is my own creation…)
The easiest or at least the quickest solution, is to have the server leave the doamin by adding it to a workgroup, then joining it back to the domain again. But, this can sometimes be a bit risky, you may have lots of service account running as domain users and so on, you don’t feel like uncoupling the server from the domain at all, then do this instead.

This guide is taking for granted that you prior to following these steps, have restored network connectivity between the server/client and the domain controllers, else this will fail. Resetting the computer password can not be done offline.

The following steps are performed on a Windows Server 2008 R2 machine, but the same steps apply to Windows Server 2012

Ok, I’ll do as I’m used to and describe what to do in a step by step guide, like this:

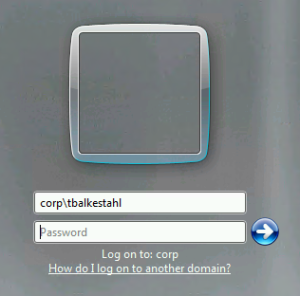
You log on to your server like you are used to, using your personal domain account:

error0You type the password and hit enter, then, BAM! This, instead of the normal logon procedure…what a start on a monday morning…

error1xNo good…if you don’t like to meddle with server affairs and are the kind of person who likes to stick to your apps once logged into the server, copy the link to this blogpost and send it to someone who can fix it…else, keep reading.

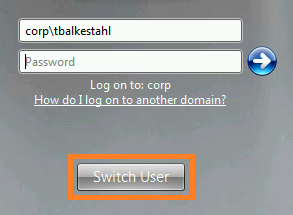
Press OK and then Switch user.

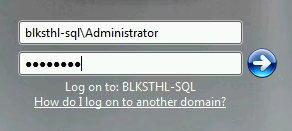
error2xThen use the local server administrator account to logon to the server.

error3In my case it is one of my SQL boxes, so I type the Servername, Backslash, Local Admin and hit Enter.

The Username can just as well be in the form: ‘.\administrator’, with the single dot replacing the servername

PowerShell Method
New Method, steps performed on Windows Server 2012 but are valid on Win7, Win8x, WS2008 and WS2012R2

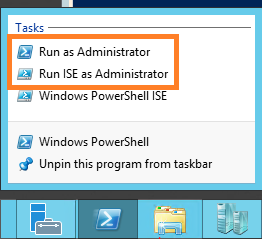
Once logged in, you will want to start a PowerShell prompt or PowerShell ISE with administrative privilieges, ‘as administrator’.

psmethod1xNext, we solve the problem by resetting the Computer password in Active Directory and on the Local machine, for this we use a PowerShell CMDlet called Reset-ComputerMachinePassword. Type in the following command:

Reset-ComputerMachinePassword -Server <Name of any domain controller> -Credential <domain admin account>

psmethod2

Hit Enter, you will then be prompted for the Domain Administrator accounts password

psmethod3Type in the password and hit OK. It will take between 2 to 10 seconds to complete Yoy will then, if everything works, see this:

psmethod4Yup, nothing overwelming like ‘Succeeded’ or OK…just the released prompt. It is a success though 🙂

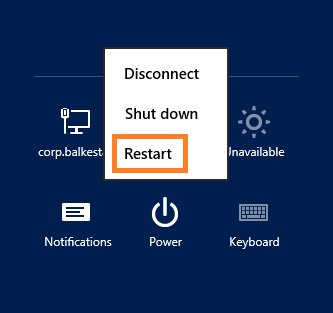
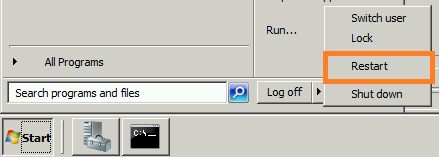
Now, we have to do one more thing before order is restored completely, we have to reboot the server. If you don’t, you will still not be able to logon using the domain account.

Use PowerShell…

rebootOr the GUI if you prefer

psmethod5xAfter the server has rebooted, you are good to go, logon using your regular personal domain account.

error0

NETDOM Method
Old method, performed on Windows Server 2008R2, but are valid also on WS2012 and WS2012R2, not however on Win7 or Win8X

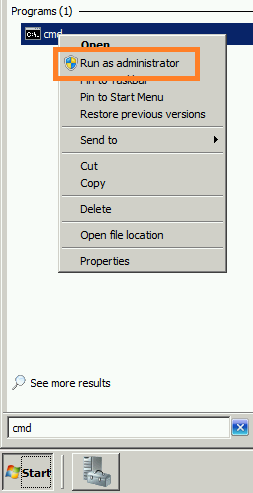
Once logged in, you will want to start a PowerShell prompt or a Command prompt with administrative privilieges, ‘as administrator’.

error4x

Next, we solve the problem by resetting the Computer password in Active Directory and on the Local machine, for this we use a commande called NETDOM.
Type in the following command:

NETDOM RESETPWD /Server:<name of any domain controller> /UserD:<domain admin account> /PasswordD:<password>

(Yes, the trailing D’s are supposed to be there, don’t ask me why…)

In my prompt it looks a bit like this:

error5xImportant! Unlike in this Picture, the domain administrators password will be visible in cleartext, so be careful and close the prompt after you are done!

If you change the password part to be /PasswordD:* It will prompt you to enter your password, and it will not be shown in the CMD box.
(Thanks to Jason Hanson for the tip, and Gerrard Singleton)

Hit Enter and if everything works, you should see this:

error6xyNow, we have to do one more thing before order is restored completely, we have to reboot the server. If you don’t, you will still not be able to logon using the domain account.

error7xAfter the server has rebooted, you are good to go, logon using your regular personal domain account.

error0

If this did not work out for you, perhaps any of these reference links can be of use for you with additional steps and alternate solutions?
Good luck!

References

NETDOM
http://technet.microsoft.com/en-us/library/cc772217(v=ws.10).aspx

Netdom Overview
http://technet.microsoft.com/sv-se/library/cc737599(v=ws.10).aspx

How to use Netdom.exe to reset machine account passwords of a Windows Server domain controller
http://support.microsoft.com/kb/325850

Reset-ComputerMachinePassword
http://technet.microsoft.com/en-us/library/hh849751.aspx

Don’t rejoin to fix
http://www.implbits.com/about/blog/tabid/78/post/don-t-rejoin-to-fix-the-trust-relationship-between-this-workstation-and-the-primary-domain-failed/default.aspx

TechNet Forum: The trust relationship between this workstation and the primary domain failed – Windows 7 Enterprise joining 2008 Domain, Error 5722
http://social.technet.microsoft.com/Forums/en-US/w7itpronetworking/thread/8155d5ea-a5c2-4306-8d2b-be3464234460/

TechNet Wiki: Trust Relationship between Workstation and Primary Domain failed
http://social.technet.microsoft.com/wiki/contents/articles/9157.trust-relationship-between-workstation-and-primary-domain-failed.aspx

Integrating Exchange 2013 + Lync 2013 for UCS & OWA integration

lyncint08Because of the Unified Communications Managed API (UCMA) 4.0 requirement on Exchange 2013 for the integrated UM role, both platforms have a similar set of prerequisite requirement. That was half the battle in 2010, because if you didn’t have the correct version of the patches, or didn’t install them in the right order, things would fail.

Along with OWA integration, Lync now supports a Unified Contact Store (UCS), which was somewhat hinted to in 2010 but didn’t come to fruition until 2013. This means that you don’t have to maintain a separate set of contact from Exchange, which was somewhat frustrating and cumbersome. This will be any admin’s friend in pushing out set groups of contacts :)

OK so enough blabbering, let’s dig in:

First, the foundation of communication between Exchange and Lync 2013 is based on the new Office Web App “OAuth” calls for server-to-server communication. As part of the installation of Lync 2013 you had to install SSL certificates to start the services, however for Exchange you’ll want to make sure you’re not using the self-signed certificates. An internal CA is fine (we’re using this in our test environment), third party is even better, but the self-signed will not be able to communicate because it’s missing the necessary subject names.

First let’s get the autodiscover service URI:

get-clientaccessserver | fl fqdn, autodiscoverserviceinternaluri

Fqdn                           : VL-EXG-01.company.local
AutoDiscoverServiceInternalUri : https://autodiscover.company.local/Autodiscover/Autodiscover.xml

Also lets take on the Lync side and get the pool FQDN:

PS C:\Users\administrator.COMPANY> Get-Cspool | where-object {$_.services –like “*UserServer*”} | fl site, fqdn

Site : Site:ConnectUC
Fqdn : lyncpool.company.local

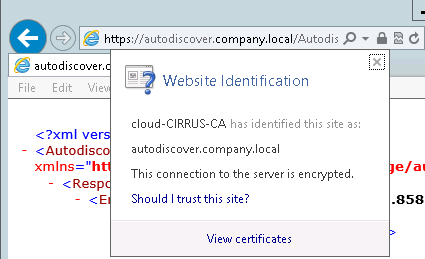
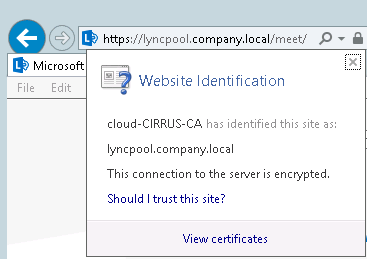
Since we’re using internally signed certificates, we’ll want to try accessing these URLs from both the Lync and Exchange servers, and ensure we can open them via IE without any certificate warnings.

lyncint01lyncint02On the Exchange 2013 environment, we link up to Lync:

cd $exscripts
.\Configure-EnterprisePartnerApplication.ps1 –AuthMetadataUrl “https://lyncpool.company.local/metadata/json/1” -ApplicationType Lync

iisreset

Now let’s update Exchange to enable IM!

The process isn’t that different from Exchange 2010, except I’ve noticed that Exchange 2013 holds on to an internal self-signed certificate so we can’t blindly use a wildcard like we did before. We need to determine which thumbprint to use by looking at the Subject name and Issuer:

Get-ExchangeCertificate | where-object {$_.services -like “*iis*” } | fl subject, issuer, services, thumbprint
Subject    : CN=mailtest.connectuc.com, OU=Connect UC, O=IT, L=Minneapolis, S=MN, C=US
Issuer     : CN=cloud-CIRRUS-CA, DC=cloud, DC=local
Services   : IMAP, POP, IIS, SMTP
Thumbprint : 5FB91CB7AB7677EF45B5C809CF8CB9CFDB31D0A1

Subject    : CN=VL-EXG-01
Issuer     : CN=VL-EXG-01
Services   : IIS, SMTP
Thumbprint : 86F218D2E3AF6D98422F18E1217C101BBC0F000B

Now that we have the thumbprint, and we know our Lync pool FQDN, let’s plug it in.

7/28/2013 Update – In my scenario I have a single CAS for Exchange 2013 and do not have separate front end/back end services. When we enable Lync IM for Exchange, we only want to target the FRONT END servers. Thanks to Varol for pointing out that Microsoft tells us that IM is “NOT” enabled on the BACK END servers.

Get-OwaVirtualDirectory -ShowBackEndVirtualDirectories -server vl-exg-01.company.local | Set-OwaVirtualDirectory -InstantMessagingEnabled $true -InstantMessagingType OCS -InstantMessagingCertificateThumbprint 5FB91CB7AB7677EF45B5C809CF8CB9CFDB31D0A1 –InstantMessagingServerName lyncpool.company.local

Get-OwaMailboxPolicy | Set-OwaMailboxPolicy -InstantMessagingEnabled $true –InstantMessagingType OCS

Next, let’s change the OWA web.config information. Use Notepad to open the

Notepad “C:\Program Files\Microsoft\Exchange Server\V15\ClientAccess\Owa\web.config”

Under <appSettings> add 2 lines, substituting your Exchange certificate thumbprint (which we already obtained) and the Lync pool name:

<add key=”IMCertificateThumbprint” value=”5FB91CB7AB7677EF45B5C809CF8CB9CFDB31D0A1” />
<add key=”IMServerName” value=”lyncpool.company.local” />

lyncint09Then recycle the related IIS pool:

C:\Windows\System32\Inetsrv\Appcmd.exe recycle apppool /apppool.name:”MSExchangeOWAAppPool”

Then over on the Lync side, we have a few commands to run in order to integrate with Exchange.

First, we create a Partner Application:

New-CsPartnerApplication -identity Exchange -ApplicationTrustLevel Full -MetadataUrl https://autodiscover.company.local/autodiscover/metadata/json/1

Next we create our trusted application pool/application. We’ll need to plug in our Exchange server name (or our NLB DNS name) and the Lync Site name we obtained earlier.

New-CsTrustedApplicationPool -Identity vl-exg-01.company.local -Registrar lyncpool.company.local -Site ConnectUC -RequiresReplication $False

New-CsTrustedApplication -ApplicationId OutlookWebAccess -TrustedApplicationPoolFqdn vl-exg-01.company.local -Port 5199

Then finally we publish our changes to the topology.

Enable-CSToplogy

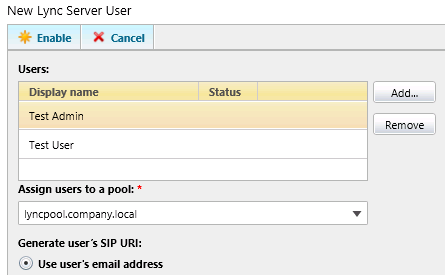
Next, we can enable our User accounts in Lync

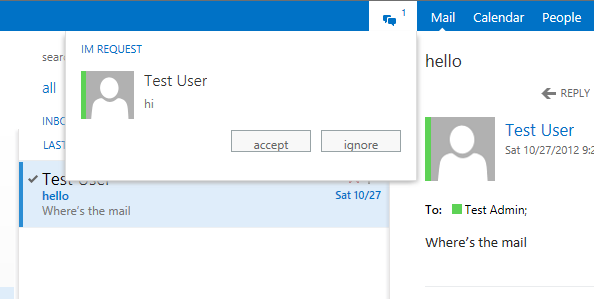
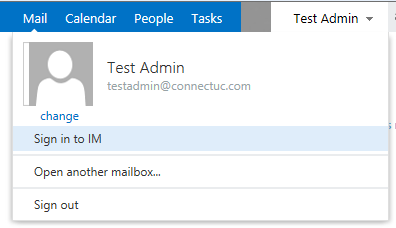
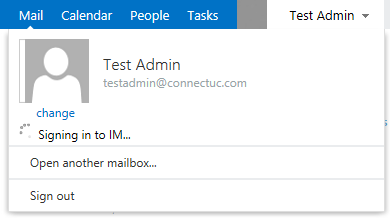
lyncint04If all went successfully, let’s log into OWA and click to Sign in to IM

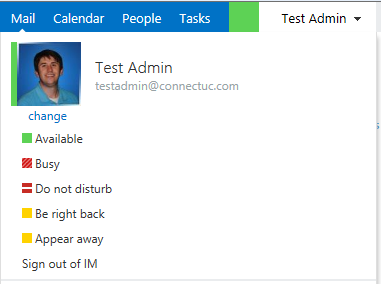
lyncint05lyncint06And success!

lyncint07

Exchange 2013 Setup error – There is a pending reboot from a previous installation

PROBLEM

The Exchange Server 2013 setup fails at the readiness checks with the following error:

There is a pending reboot from a previous installation of Windows Server role or feature. Please restart the computer and then run Setup again.

The problem remains even after several restart attempts and setup is not able to continue.

CAUSE

The Exchange Server Setup reads several registry keys to determine whether a system restart is required after a previous installation of a server component, application or hotfix.

If there is anything wrong there, the Exchange setup will report that a restart is needed and will not continue.

In regards to those checks, the following  3 cases are possible:

CASE 1

The registry key HKEY_LOCAL_MACHINE\SOFTWARE\Microsoft\Updates\UpdateExeVolatile   does not exist. This is a typical situation on a fresh Windows Server 2012 installation.

SOLUTION

Using registry editor, create the key and set its value to 0.

CASE 2

The registry key HKEY_LOCAL_MACHINE\SOFTWARE\Microsoft\Updates\UpdateExeVolatile  exists, but the value is set to a value other than 0.

SOLUTION 

Using the registry editor set the value of the UpdateExeVolatile to 0.

CASE 3

The registriy key HKEY_LOCAL_MACHINE\SYSTEM\CurrentControlSet\Control\Session Manager\PendingFileRenameOperations  contains any values.

SOLUTION

Delete any values existing under the PendingFileRenameOperations  key.

Postfix/DKIM

Introduction

DomainKeys Identified Mail (DKIM) is a method for E-mail authentication, allowing a person who receives email to verify that the message actually comes from the domain that it claims to have come from. The need for this type of authentication arises because spam often has forged headers.

DKIM uses public-key cryptography to allow the sender to electronically sign legitimate emails in a way that can be verified by recipients.

DKIM also guards against tampering with mail, offering almost end-to-end integrity from a signing to a verifying Mail transfer agent (MTA).

Read more on Wikipedia

dkim-milter is a milter-based application (dkim-filter) which plugs in to Postfix to provide DomainKeys Identified Mail service for your mail server. dkim-milter is no longer being developed, and it’s original author has forked the source and is now developing opendkim. For Lucid and later releases, opendkim is preferred over dkim-filter. The instructions on this page should be the same (just with adjusted package names as needed).

Installation

We assume you already successfully installed Postfix MTA, if not, please read the Postfix dedicated page.

To install opendkim, you need Universe repositories added, if so, use your favorite package manager and install the package.

sudo aptitude install opendkim opendkim-tools

Important: For 12.04 Precise you must install opendkim from the precise backports. Note that backports are enabled only by using /precise-backports on a given package, so this will not affect any other packages you have installed.

sudo aptitude install opendkim/precise-backports
sudo aptitude install opendkim-tools/precise-backports

Configuration

opendkim configuration consists of two files:

/etc/opendkim.conf
/etc/default/opendkim

Use your favorite editor to edit those files. Here’s an example of /etc/opendkim.conf file already edited to suit my needs:

# Log to syslog
Syslog                  yes
# Required to use local socket with MTAs that access the socket as a non-
# privileged user (e.g. Postfix)
#UMask                  002
# dkim-milter (2.5.2.dfsg-1ubuntu1) hardy:
# Disable new umask option by default (not needed since Ubuntu default
# uses a TCP socket instead of a Unix socket).

# Attempt to become the specified userid before starting operations.
#UserID                 105 # 'id postfix' in your shell


# Sign for example.com with key in /etc/mail/dkim.key using
# selector '2007' (e.g. 2007._domainkey.example.com)
Domain                  ubuntu.ro
KeyFile                 /etc/mail/dkim.key # See bellow how to generate and set up the key
Selector                mail

# Common settings. See dkim-filter.conf(5) for more information.
AutoRestart             yes
Background              yes
Canonicalization        relaxed/relaxed
DNSTimeout              5
Mode                    sv
SignatureAlgorithm      rsa-sha256
SubDomains              no
#UseASPDiscard          no
#Version                rfc4871
X-Header                no

#InternalHosts          /etc/mail/dkim-InternalHosts.txt
# The contents of /etc/mail/dkim-InternalHosts.txt should be
#   127.0.0.1/8
#   192.168.1.0/24
#   other.internal.host.domain.tld
# You need InternalHosts if you are signing e-mails on a gateway mail server
# for each of the computers on your LAN.


###############################################
# Other (less-standard) configuration options #
###############################################
#
# If enabled, log verification stats here
Statistics              /var/log/dkim-filter/dkim-stats
#
# KeyList is a file containing tuples of key information. Requires
# KeyFile to be unset. Each line of the file should be of the format:
#    sender glob:signing domain:signing key file
# Blank lines and lines beginning with # are ignored. Selector will be
# derived from the key's filename.
#KeyList                /etc/dkim-keys.conf
#
# If enabled, will generate verification failure reports for any messages
# that fail signature verification. These will be sent to the r= address
# in the policy record, if any.
#ReportInfo             yes
#
# If enabled, will issue a Sendmail QUARANTINE for any messages that fail
# signature verification, allowing them to be inspected later.
#Quarantine             yes
#
# If enabled, will check for required headers when processing messages.
# At a minimum, that means From: and Date: will be required. Messages not
# containing the required headers will not be signed or verified, but will
# be passed through
#RequiredHeaders        yes

Actually /etc/opendkim.conf is the most important file. It provides our milter with required information about selector (used for DNS requests and email verifications) and used signing key (the key is used for signing the outgoing emails).

Here’s an example of /etc/default/opendkim This file is used to connect the milter to MTA:

# Command-line options specified here will override the contents of
# /etc/dkim-filter.conf. See dkim-filter(8) for a complete list of options.
#DAEMON_OPTS=""
#
# Uncomment to specify an alternate socket
# Note that setting this will override any Socket value in dkim-filter.conf
#SOCKET="local:/var/run/dkim-filter/dkim-filter.sock" # Debian default
#SOCKET="inet:54321" # listen on all interfaces on port 54321
SOCKET="inet:8891@localhost" # Ubuntu default - listen on loopback on port 8891
#SOCKET="inet:12345@192.0.2.1" # listen on 192.0.2.1 on port 12345

In my case, this file needs no additional editing.

Now, to tell the Postfix about the existing milter, and where to connect with it, edit your Postfix main.cf file /etc/postfix/main.cf, and append to its content the following data:

# DKIM
milter_default_action = accept
milter_protocol = 2
smtpd_milters = inet:localhost:8891
non_smtpd_milters = inet:localhost:8891

If you are using already some milter (for example Postfix/DomainKeys), you can add the new one like this:

milter_default_action = accept
milter_protocol = 2
smtpd_milters = inet:localhost:8891,inet:localhost:8892
non_smtpd_milters = inet:localhost:8891,inet:localhost:8892

Key generation for dkim-milter and its setup with DNS

The opendkim-tools package provides a tool, opendkim-genkey for creating your key pairs:

opendkim-genkey -t -s mail -d ubuntu.ro

This will generate two files: mail.private which is your private key, and mail.txt which is your DNS record containing your public key.

The -s argument supplies the selector (in our case “mail”), the -d argument supplies the domain, and the -t argument says that we are running DKIM in test mode. This indicates that verifiers shouldn’t drop your mail if something’s wrong with the signature. Its seems that the majority using DKIM run it in test mode.

Copy your private key in place:

cp mail.private /etc/mail/dkim.key

Now create your DNS record as supplied in mail.txt, which should look like this:

mail._domainkey.ubuntu.ro. IN TXT "v=DKIM1; g=*; k=rsa; p=PpYHdE2tevfEpvL1Tk2dDYv0pF28/f 5MxU83x/0bsn4R4p7waPaz1IbOGs/6bm5QIDAQAB" ; ----- DKIM mail for ubuntu.ro

Startup and testing

Once configuration above was done, the daemon can be started with:

sudo service opendkim start

If it doesn’t start, search the logs for problems and see what it requires more:

grep -i dkim /var/log/mail.log

Instead of using sudo service opendkim start you can run dkim-filter directly:

dkim-filter -x /etc/dkim-filter.conf

If you get the error like: dkim-filter: milter socket must be specified Then try manually specifying the socket. Use this to specify local (which does not match /etc/default/dkim-filter above):

dkim-filter -x /etc/dkim-filter.conf -p local

Now restart the Postfix MTA, and check for email signing:

sudo service postfix restart

For testing purposes, I recommend you tools like:

Common errors and fixes

Missing signature

If something is not functioning properly (emails are not being signed) look for errors in the log:

grep -i dkim /var/log/mail.log

The following error indicates the filter ran properly however could not match the outgoing email domain with a filter (and thus no signature was generated):

Nov 21 06:59:56 appname dkim-filter[2911]: 81AA7E688: no signature data

Consider changing the domain to a wildcard in /etc/opendkim.conf:

# Sign for example.com with key in /etc/mail/dkim.key using
# selector '2007' (e.g. 2007._domainkey.example.com)
Domain                  *
KeyFile                 /etc/mail/dkim.key
Selector                mail

Using a domain of * will require putting the dkim key into EACH domain’s DNS zone file for those domains that send email using this server. The dkim signing will work for your server, but without updating each DNS zone file, the public key will not be found by the recipient mail server.

Multiple signatures

If amavis-new is installed and dkim signs emails multiple times with same domain and selector, is the configuration error likely to be how you feed messages back to postfix from amavis.

Head to /etc/postfix/master.cf look for the section starting with:

127.0.0.1:10025 inet    n       -       -       -       -       smtpd

Find the option -o receive_override_options= and add ,no_milters to the end of that line. A corrected config could look something like this:

127.0.0.1:10025 inet    n       -       -       -       -       smtpd
        -o content_filter=
        -o local_recipient_maps=
        -o relay_recipient_maps=
        -o smtpd_restriction_classes=
        -o smtpd_delay_reject=no
        -o smtpd_client_restrictions=permit_mynetworks,reject
        -o smtpd_helo_restrictions=
        -o smtpd_sender_restrictions=
        -o smtpd_recipient_restrictions=permit_mynetworks,reject
        -o smtpd_data_restrictions=reject_unauth_pipelining
        -o smtpd_end_of_data_restrictions=
        -o mynetworks=127.0.0.0/8
        -o smtpd_error_sleep_time=0
        -o smtpd_soft_error_limit=1001
        -o smtpd_hard_error_limit=1000
        -o smtpd_client_connection_count_limit=0
        -o smtpd_client_connection_rate_limit=0
        -o receive_override_options=no_header_body_checks,no_unknown_recipient_checks,no_milters

Registry hackom do produženja životnog vijeka Windowsa XP?

Ponekad se iznenadimo koliko stvari mogu biti genijalne u svojoj jednostavnosti. Ispostavilo se, eto, da je moguće produžiti zagrobni život Windowsima XP dodavanjem jednostavnog ključa u registry, kako je to opisano na forum stranici Sebijk.

Sve što trebate je dodati ovaj ključ:

[HKEY_LOCAL_MACHINE\SYSTEM\WPA\PosReady]
"Installed"=dword:00000001

Ovaj jednostavan hack “nagovorit” će Windowse XP da umisle kako su POSReady 2009 Edition – Windows XP za POS uređaje. Za razliku od “običnih” Windowsa XP, POSReady imaju podršku do 2019. godine.

Isto tako, obzirom na svoju specifičnu namjenu, POSReady je bitno manji od “običnih” Windowsa XP, nedostaju mu neke funkcije, dok istovremeno sadrži neke funkcije koje XP nema; za cjelokupan popis razlika pogledajte ovaj dokument.

Prije nego se poveselite produženju života stare krame koju morate održavati jer u blagajni nema novca za pristojnu informatičku opremu, jedno ozbiljno upozorenje: iako je promjena u registry-u Windowsa s tehničke strane gledano jednostavna, riječ je o protuzakonitoj radnji!

Naime, stavljanjem navedene promjene u registry kršite licencu: nabavili ste licencu za XP, a promjenom ste stroj naveli da se ponaša kao da je POSReady – posve drugi proizvod, za kojeg nemate licencu. Iako bi vam se na prvi pogled moglo učiniti da jednostavno dodavanje ključa ne mijenja Windows XP jer je ostatak sustava naravno ostao isti, bili biste u krivu: tom promjenom učinili ste neautoriziranu izmjenu na sustavu.

Drugo, jednako tako važno upozorenje je da te dvije verzije Windowsa nisu identične: one se razlikuju u komponentama. To praktički znači da će Microsoft održavati samo one komponente koje se nalaze u POS verziji, što znači da potencijalni sigurnosni propusti komponenti koje posjeduje XP a POS ne – neće biti rješavani. Tu se krije opasnost da korisnik zaboravi na tu nezgodnu činjenicu i uljuljka se u lažni osjećaj sigurnosti.

Čemu bi onda mogao koristiti ovaj hack?

Možemo ga gledati kao privremenu vatrogasnu mjeru na svim onim mjestima koja iz nekog razloga nisu migrirala sa Windowsa XP na nešto novije – bilo zato što imaju softver i hardver koji radi samo pod tom verzijom Windowsa (poput, primjerice, moje nesretne kamere za mikroskop), bilo zato što zbog nedostatka sredstava ili nerazumjevanja nadređenih ne mogu provesti migraciju na novu platformu.

Sistemašima u ustanovama pogođenim besparicom ova vatrogasna mjera mogla bi pomoći da dobiju na vremenu i održe kakvu-takvu sigurnost sustava dok se konačno ne pronađu neka sredstva ili promjeni volja nadređenih. Ipak, ne zaboravite da je gore navedeni hack nelegalan – pa ako već o njemu razmišljate, najprije ozbiljno porazgovarajte s nadređenima, objasnite im što se može a što ne, te posebice jasno dajte do znanja da to nije trajno rješenje i da ga mora slijediti ozbiljna nadogradnja ispravno licenciranog softvera.

Ako se odlučite za “hakersko” rješenje, najprije zatražite crno na bijelo dozvolu viših instanci: nadređenima će svakako biti super čuti da još nekoliko godina neće morati kupovati nove Windowse, ali netko mora preuzeti odgovornost za postupak koji je u biti ilegalan. Nemojte to biti vi, već vaš nadređeni; osvjestite li nadređenima pravnu problematiku i prebacite li odgovornost na njih, imat ćete dvostruku “korist”:

  • u slučaju problema imat ćete papir koji pokazuje da ste samo radili što vam je “odozgor” naređeno;
  • nadređeni će postati svjesni potrebe za hitnom migracijom i rješavanjem licenčnih pitanja.

Naravno, pravo rješenje je nabava novih računala s licencama za novije inačice Windowse, ili, ako nema novaca, zamjena Windowsa nekom verzijom Linuxa. No ovaj šaljivi prilog zapravo nastoji pokazati kako su rješenja na tehničkoj razini ponekad mnogo jednostavnija od rješenja na socijalnoj razini.

Preuzeto s portala Sistemac.

Hartbleed živi dalje

Dva mjeseca nakon otkrića opasnog Heartbleed sigurnosnog propusta u OpenSSL biblioteci, nešto više od polovice ranjivih servera je patchirano, dok je, kako tvrdi Errata Security, ostatak i dalje osjetljiv na napad.

Iako testiranje nije obavljeno na rigorozan način (korištena je poprilično jednostavna metoda – skeniran je samo port 443), pa brojka nije posve pozdana, imamo razloga vjerovati kako je unatoč tome broj ranjivih strojeva na Internetu pozamašan. Kako sam autor softvera za testiranje ranjivosti tvrdi, nakon inicijalne panike po objavi sigurnosnog propusta, kada se u kratkom roku prepolovio broj ranjivih servera, brzina patchiranja drastično je opala: razlog tome može biti jedan od dva slučaja: ostali su nepatchirani uređaji koje iz nekog razloga nije bilo moguće zakrpati (embedded uređaji, primjerice) i serveri koji nisu patchirani zbog lijenosti/neznanja administratora ili nerazumne poslovne odluke. U tu grupu svakako treba ubrojiti i potencijalne embedded uređaje za koje je u međuvremenu izdan novi firmware, ali koji iz sličnog razloga nisu osvježeni popravljenom verzijom.

U svakom slučaju, brojka od 309,197 sustava koji su još uvijek potencijalno ranjivi tjera na razmišljanje.

Clanak preuzet sa Sistemac Portala.

How Anonymous Relay works in Exchange 2013

This article is to provide you, the reader, the knowledge on how to properly create an Exchange 2013 Relay Connector.

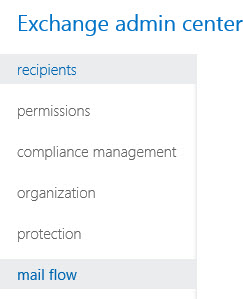
In Exchange 2013, I am utilizing a multi-role server that has both the Client Access Server and Mailbox Server roles. We’ll want to head to the mail flow section in the Exchange Administration Center (EAC) that you can access by going to https://OWA.domain.com/ECP.

E15Relay02

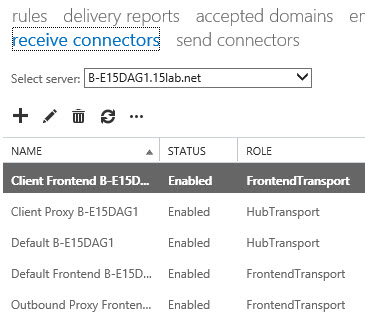
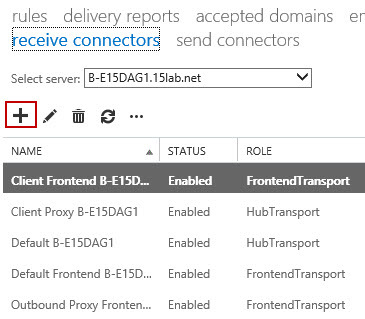
Once in this mail flow section, we’ll click the tab called receive connectors which will allow us to see all receive connectors that exist.

E15Relay03

As you can see, there are connectors for FrontendTransport and connectors for HubTransport.  FrontEndTransport belongs to the Client Access Server Role and the HubTransport role belongs to the Mailbox Server role.

Let’s take a look at the “Default B-E15DAG1″ receive connector that belongs to the HubTransport role  as well as the “Default Frontend B-E15DAG1″ that belongs to the FrontendTransport role.

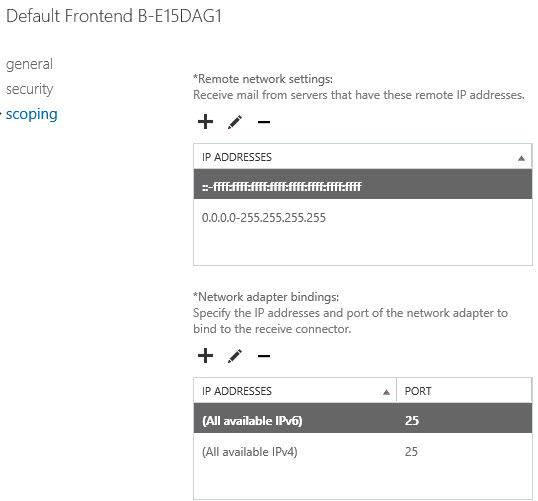
Taking a look at the “Default FrontEnd B-E15DAG1″, we can see that the connector listens on port 25 as we would expect.

E15Relay05

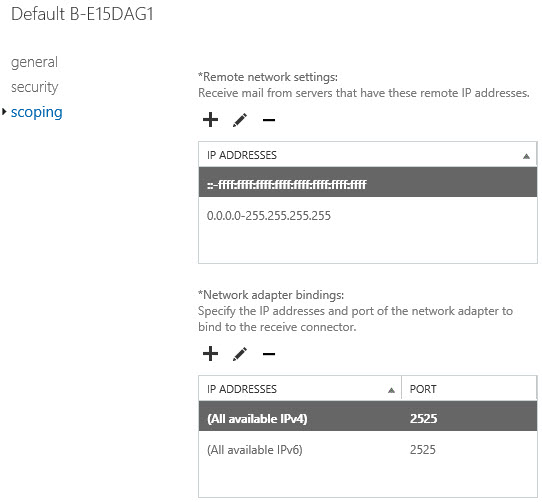
Taking a look at the “Default B-E15DAG1″ receive connector, we can see it listens on port 2525 which is something we haven’t seen before.

E15Relay04

All mail flow should come into the Frontend Transport which then delivers it to the appropriate mailbox server where the mailboxes exist.  On a multi-role server, these two roles cannot utilize the same ports as they are two different services.  What this means is, when creating a relay connector, this connector must be created on the Client Access Server role that owns the Frontend Transport because this service is the service that owns port 25.  If you try to create a receive connector on the Mailbox Server role that owns the HubTransport service, mail flow may work temporarily, but it will eventually fail due to both the FrontendTransport and HubTransport services fighting each other for port 25.  Obviously if the Client Access Server and Mailbox Server roles are on different servers, it’s not an issue.

To create our relay connector, we’ll choose the + symbol to create a new Receive Connector.

E15Relay06

Give the connector a name and be sure to choose Frontend Transport and Custom. Click Next.

E15Relay07

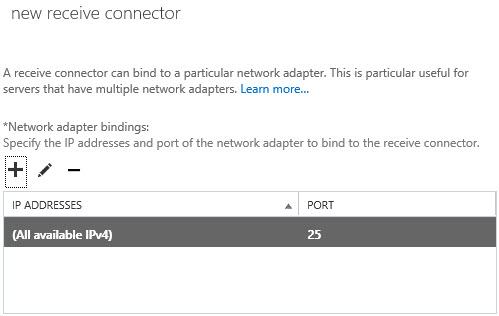
The default settings here are fine.  We want port 25 due to what I mentioned above. Click Next.

E15Relay08

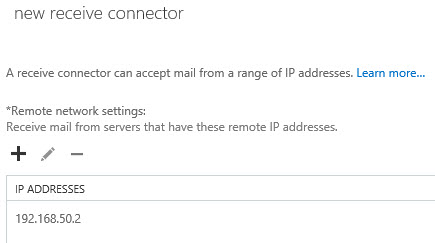
In the remote network settings, it is important to ensure that you remove 0.0.0.0-255.255.255.255.  We want to explicitly define what servers are allowed to relay to ensure our server does not turn into an open relay for everybody.  In my case, I am going to add 192.168.50.2 which may be a printer, custom application, etc…  But the server that owns 192.168.50.2 would need to relay.  Once this is done, click Finish.

E15Relay09

So what really happens when you place a check mark in the Anonymous users group in the above screenshot?  A lot of people are afraid to place a checkmark in that box in fear that anonymous users will be able to relay off your Exchange Server.  This is NOT the case.

When you place a checkmark in that box, the following permissions are given to the Anonymous Logon group:

  • Ms-Exch-SMTP-Submit
  • Ms-Exch-SMTP-Accept-Any-Sender
  • Ms-Exch-SMTP-Accept-Authoritative-Domain-Sender
  • Ms-Exch-Accept-Headers-Routing

So, as you can see, there is no Ms-Exch-SMTP-Accept-Any-Recipient permission added by default.  Because of this, users will NOT be able to relay off your Exchange Server by default.

To activate Anonymous users to use this connector for relaying, you must issue the following command:

Get-ReceiveConnector “Receive Connector Name” | Add-ADPermission -User “NT AUTHORITY\ANONYMOUS LOGON” -ExtendedRights “Ms-Exch-SMTP-Accept-Any-Recipient”

The command should be easy enough to read, but what it essentially does is retrieve the receive connector that you created, add a permission into Active Directory for the Anonymous Logon group, and assign that group the Ms-Exch-SMTP-Accept-Any-Recipient permission for that group on that connector.  Once this is done, any server IPs you added to the Remote Network settings will be allowed to relay off your server utilizing port 25.

E15Relay11

Now you may be thinking, why should I create this new connector?  Well, Exchange will always look to see how specific you are on a connector.  So let’s say we have a SharePoint Server at 192.168.119.150.  We would create a relay connector and allow ONLY 192.168.119.150 to relay.  So when Exchange receives SMTP from an address of 192.168.119.150, it will see there are a few connectors.  One being the Default Receive Connector and one being the Relay Connector.  The Default Receive Connector allows connections from any IP Address while the Relay Connector only allows connections from 192.168.119.150.  Because you explicitly set the address on your Relay Connector, that is given higher preference in serving that SMTP connection from SharePoint and your SharePoint Server will now be able to relay off of Exchange (even though you can configure SharePoint to authenticate, but still just giving an example).

Now, for servers that will have a lot of relay traffic, there are some more steps you need to do on your Receive Connector.  If you see that you have mail flow issues where things periodically work with relaying and sometimes they don’t, it’s recommended to run the following commands on your Relay Connector.

Set-ReceiveConnector -identity “Relay Connector Name” -TarpitInterval 00:00:00

Set-ReceiveConnector -identity “Relay Connector Name” -ConnectionTimeout 00:30:00

Set-ReceiveConnector -identity “Relay Connector Name” -ConnectionInactivityTimeout 00:20:00

Set-ReceiveConnector -identity “Relay Connector Name” -MaxAcknowledgementDelay 00:00:00

Set-ReceiveConnector -identity “Relay Connector Name” -MaxInboundConnection 10000

Set-ReceiveConnector -identity “Relay Connector Name” -MaxInboundConnectionPercentagePerSource 100

Set-ReceiveConnector -identity “Relay Connector Name” -MaxInboundConnectionPerSource unlimited

So in my case, I would run the following command which would allow me to do Get-ReceiveConnector and pipe into Set-ReceiveConnector to make all the modifications in one command:

Get-ReceiveConnector -Identity “Relay Connector Name” | Set-ReceiveConnector -TarpitInterval 00:00:00 -ConnectionTimeout 00:30:00 -ConnectionInactivityTimeout 00:20:00 -MaxAcknowledgementDelay 00:00:00 -MaxInboundConnection 10000 -MaxInboundConnectionPercentagePerSource 100 -MaxInboundConnectionPerSource unlimited

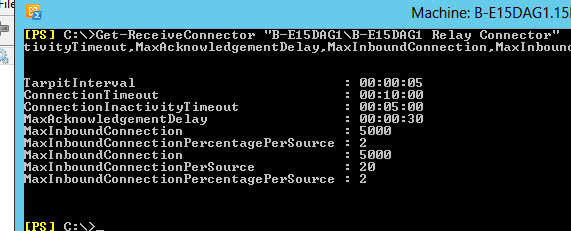
E15Relay12If you are wondering what the default settings were, I ran the following to view the defaults before running Set-ReceiveConnector.

E15Relay13